Enhancing communication between extensions and webviews using VS Code Messenger
 Dennis Hübner
In the software development ecosystem, VS Code has emerged as a powerful and flexible IDE that developers love not only for writing and maintaining their code but also for its extensibility. This extensibility allows us to create custom tools within the IDE, turning VS Code into a truly versatile platform. Tool applications often come with a set of helpful views presented via webviews that interact with the main extension to provide a rich user experience.
Webviews and how to communicate with them
Webviews play an important role in VS Code by enabling extensions to display content in distinct HTML documents. To preserve a secure and stable setting, webviews are isolated and interact with extensions by exchanging JSON messages back and forth.
However, setting up message exchanges between the extension and webview can be quite challenging. One of the significant challenges is the lack of commonly used types, which makes the implementation harder to maintain as the codebase grows. The issue becomes more complex when dealing with interactions between separate webviews. In addition, setting up the communication also requires writing a lot of boilerplate code. The combined effect of these issues presents a considerable risk to the system’s maintainability and stability.
VS Code Messenger library
To simplify the communication process, we have developed a library called vscode-messenger. This library uses a JSON RPC-like protocol to facilitate message exchange between the extension and webview. It offers several standout features that simplify the complex communication landscape.
Multidirectional Messaging: The library allows for sending notifications and asynchronous requests in multiple directions - from an extension to a specific view, a view group, or even broadcasting to all registered views. Similarly, a view can send messages to another view, a group, or back to the host extension. This versatility ensures that any component within the extension’s domain can effectively communicate with any other, ensuring high flexibility in interactive operations.
Typed API: The library boasts a typed API, significantly improving the developer experience by ensuring that contracts between messaging parties are clear and enforceable. This strong typing leads to better compile-time checks, accurate IntelliSense suggestions within VS Code, and, importantly, fewer runtime errors due to unexpected message payloads.
View Management: vscode-messenger takes care of the view lifecycle by automatically unregistering views when they are disposed of. This feature helps prevent memory leaks and other lifecycle-related bugs that could arise from manually managing view registrations and deregistrations.
Using the library
Before using vscode-messenger, you need to install it as a dependency in your extension project. As webviews typically have their own package.json file, you need to install the library in both the extension and webview projects. The library is available on the npm registry, so you can install it using your favorite package manager.
In the extension project, add the vscode-messenger package to the package.json file:
"dependencies": {
    "vscode-messenger": "^0.4.5"
}
For the webview project, add the vscode-messenger-webview package to the package.json file:
"dependencies": {
    "vscode-messenger-webview": "~0.4.5"
}
Both packages have only one dependency, which is the vscode-messenger-common package. This package contains the common types and interfaces used by both the extension and webview packages. It is not necessary to install this package separately, as it will be installed automatically as a dependency of the other two packages.
It is also recommended to have a common package in all VS Code extension projects that provide a webview. This package can be used as a dependency in the extension and webview projects to share common types, such as message types. This way, you can avoid having multiple copies of the same types and interfaces in your project.
Using the library: extension side
To interact with the vscode-messenger API, you first need to create a Messenger instance in your extension.
// extension.ts in the extension package

export function activate(context: vscode.ExtensionContext) {
    const messenger = new Messenger({ debugLog: true });
    // ... //
}
The Messenger class is the main entry point of the library and implements the MessengerAPI interface from the vscode-messenger-common package. According to the interface definition, the class provides the following functionality:
-
Sending notifications and requests to a specific view, a view group, or all registered views.
-
Handling incoming notifications and requests.
-
In addition to the interface, the
Messengerclass allows you to register and unregister webviews as messaging participants. VS Code offers different webview types such asvscode.WebviewPanelandvscode.WebviewView, depending on the kind of webview (panel, view, or editor). Both types are supported by the API.
The Messenger constructor takes an optional MessengerOptions object as a parameter. This object can be used to configure the Messenger instance. The following options are available:
ignoreHiddenViews?: boolean- A message is ignored if the receiver is a webview that is currently hidden (not visible). The default istrue.uniqueHandlers?: boolean- Enforces message handlers to be unique for each message type. If set totrue, an error is thrown if a message handler is registered for a message type that already has a handler. The default isfalse.debugLog?: boolean- Whether to log any debug-level messages to the console. The default isfalse.
With a Messenger instance in place, you will probably first register your webviews. This can be done by calling the registerWebviewView or registerWebviewPanel method, depending on the view kind. The registered views are automatically unregistered when they are disposed of. The register methods also have an additional options parameter that can be used to configure the view registration. Currently, only one option is available:
broadcastMethods?: string[]- Specifies a list of methods that the webview should receive when corresponding notifications are sent with abroadcasttype. When a notification corresponding to any of the listed methods is broadcasted, the webview will be notified. If this option is omitted or set toundefined, the webview will not receive any broadcast notifications. The default isundefined.
The return value of the register methods is a WebviewIdMessageParticipant instance that holds the webviewId of the registered view. This id can be used to send messages to the concrete view instance instead of sending them to all the views of the same view type. As there is normally only one view of a specific view type, the webviewId is not needed in most cases.
const messenger = new Messenger({ debugLog: true });
const VIEW_TYPE = 'myViewType';
const webViewPanel = window.createWebviewPanel(VIEW_TYPE, 'Fancy View', ViewColumn.One, {});
messenger.registerWebviewPanel(webViewPanel);
Before starting to send messages to the webview, a common message type should be defined. The common package vscode-messenger-common offers two primary message types: NotificationType and RequestType. As a first example, let’s define a NotificationType message that will be sent to the webview. Suppose we want to inform the view about a selection change. The message type can be defined as follows:
// common-types.ts in the common package

// Payload descriptor type
export type Selection = {
    start: number;
    end: number;
};

// The message type
export const SelectionChanged: NotificationType<Selection> = {
    method: 'selectionChanged'
};
To send a notification to the webview, we need to call the sendNotification method of the Messenger instance. The method takes the following parameters:
-
type- The message type we defined previously. -
receiver- The receiver of the message. It can be anExtensionMessageParticipant,WebviewMessageParticipant, orBroadcastMessageParticipantinstance. TheExtensionMessageParticipantinstance is used to send messages to the extension. TheWebviewMessageParticipantinstance is used to send messages to a specific webview. TheBroadcastMessageParticipantinstance is used to send messages to all registered webviews. -
params- The message payload. It is optional and can be omitted if the message type does not have a payload.
In our case, we want to send the SelectionChanged notification to the myViewType webview. The receiver parameter should be a WebviewTypeMessageParticipant instance that holds the webviewType of the registered view. The params parameter should be an object that holds the selection information. The sendNotification method can be called as follows:
messenger.sendNotification(SelectionChanged, { type: 'webview', webviewType: VIEW_TYPE }, { start: 3, end: 4 });
We can extract the MessageParticipant instance into a variable to reuse it in other communications and make the code more readable.
const fancyView: WebviewTypeMessageParticipant = {
    type: 'webview',
    webviewType: VIEW_TYPE
};

messenger.sendNotification(SelectionChanged, fancyView, { start: 3, end: 4 });
The notification is now sent, but the webview is not ready to receive it yet.
Using the library: webview side
Setting up the webview to work with the library is almost the same as for the extension. The vscode-messenger-webview npm package also provides a Messenger class that implements the MessengerAPI interface, allowing messages to be sent and message handlers to be registered inside a webview. The Messenger constructor for webviews takes a VsCodeApi object as a parameter. This object is provided by VS Code and is used to communicate with the host extension. The VsCodeApi object is injected into the webview by the host extension using the globally defined acquireVsCodeApi function. The Messenger instance in a webview can be created as follows:
// fancy-webview.ts in the webview package
export declare function acquireVsCodeApi(): VsCodeApi;

const vsCodeApi = acquireVsCodeApi();
const viewMessenger = new Messenger(vsCodeApi);
In contrast to the extension, the webview messenger instance needs to be started explicitly. This is important because the handlers need to be registered before we start listening for incoming messages. So the start method can be called only once, and it should be called after all the handlers are registered.
Following the example above, we can register a handler for the SelectionChanged notification as follows:
const viewMessenger = new Messenger(vsCodeApi);

viewMessenger.onNotification(SelectionChanged, (selection) => {
    // Parameter 'selection' is of type Selection inferred from the message type.
    console.log(`Selection data received: ${selection.start}, ${selection.end}`);
});

viewMessenger.start();
The onNotification as well as the onRequest method takes two parameters. The first is the message type, and the second is the message handler, NotificationHandler or RequestHandler respectively. The message handler is a function that takes the message payload as a parameter. The message handler can be a normal function or an async function. The return value of the message handler is ignored for notifications and is used as a response for requests.
Both together
Now we have working communication between the extension and the webview. The extension can send a notification to the webview, and the webview can handle the notification. As an additional example, let’s send a request from the webview to the extension to get a list of currently opened editors with a specific file extension. Even though handling such a request is fast, we will use an async handler to demonstrate how to handle async requests.
First, we define the communication protocol by adding a new RequestType that has a parameter of type string and a response of type string[]:
// common-types.ts in the common package
export const OpenedEditorsRequest: RequestType<string, string[]> = {
    method: 'openedEditors'
};
In the webview, we trigger a request to the extension. The library provides a pre-defined HOST_EXTENSION constant that can be used as a MessageParticipant to send messages to the host extension. The sendRequest method returns a promise that resolves to the response payload.
// fancy-webview.ts in the webview package

const openedEditors = await viewMessenger.sendRequest(OpenedEditorsRequest, HOST_EXTENSION, '.md');
openedEditors.forEach(editor => {
    console.log(`Opened editor: ${editor}`);
});
The last missing part is to handle the request handler in the extension. Note that the handler function is async.
// extension.ts in the extension package
const messenger = new Messenger({ debugLog: true });
const VIEW_TYPE = 'myViewType';
const webViewPanel = window.createWebviewPanel(VIEW_TYPE, 'Fancy View', ViewColumn.One, {});
messenger.registerWebviewPanel(webViewPanel);

// ... //

const disposable = messenger.onRequest(OpenedEditorsRequest, async (fileExt) => {
    const openedEditors = // get a list of opened files
    return openedEditors.filter(fileName => fileName.endsWith(fileExt));
});


webViewPanel.onDidDispose(() => {
    disposable.dispose();
});
The onRequest and onNotification methods in the extension’s Messenger return a Disposable instance that can be used to unregister the message handler. This is useful if you want to unregister the handler when the extension is deactivated or the corresponding webview panel is disposed.
That’s basically it – the communication between the webviews or sending a broadcast messages works the same way, only the message receiver is different.
Introducing the messaging visualization tool for monitoring VS Code communication
In addition to the vscode-messenger library, we have developed a complementary messaging visualization tool called “VS Code Messenger Devtools”. Delivered as a convenient VS Code extension, this tool is available on the Microsoft Marketplace.
Monitoring
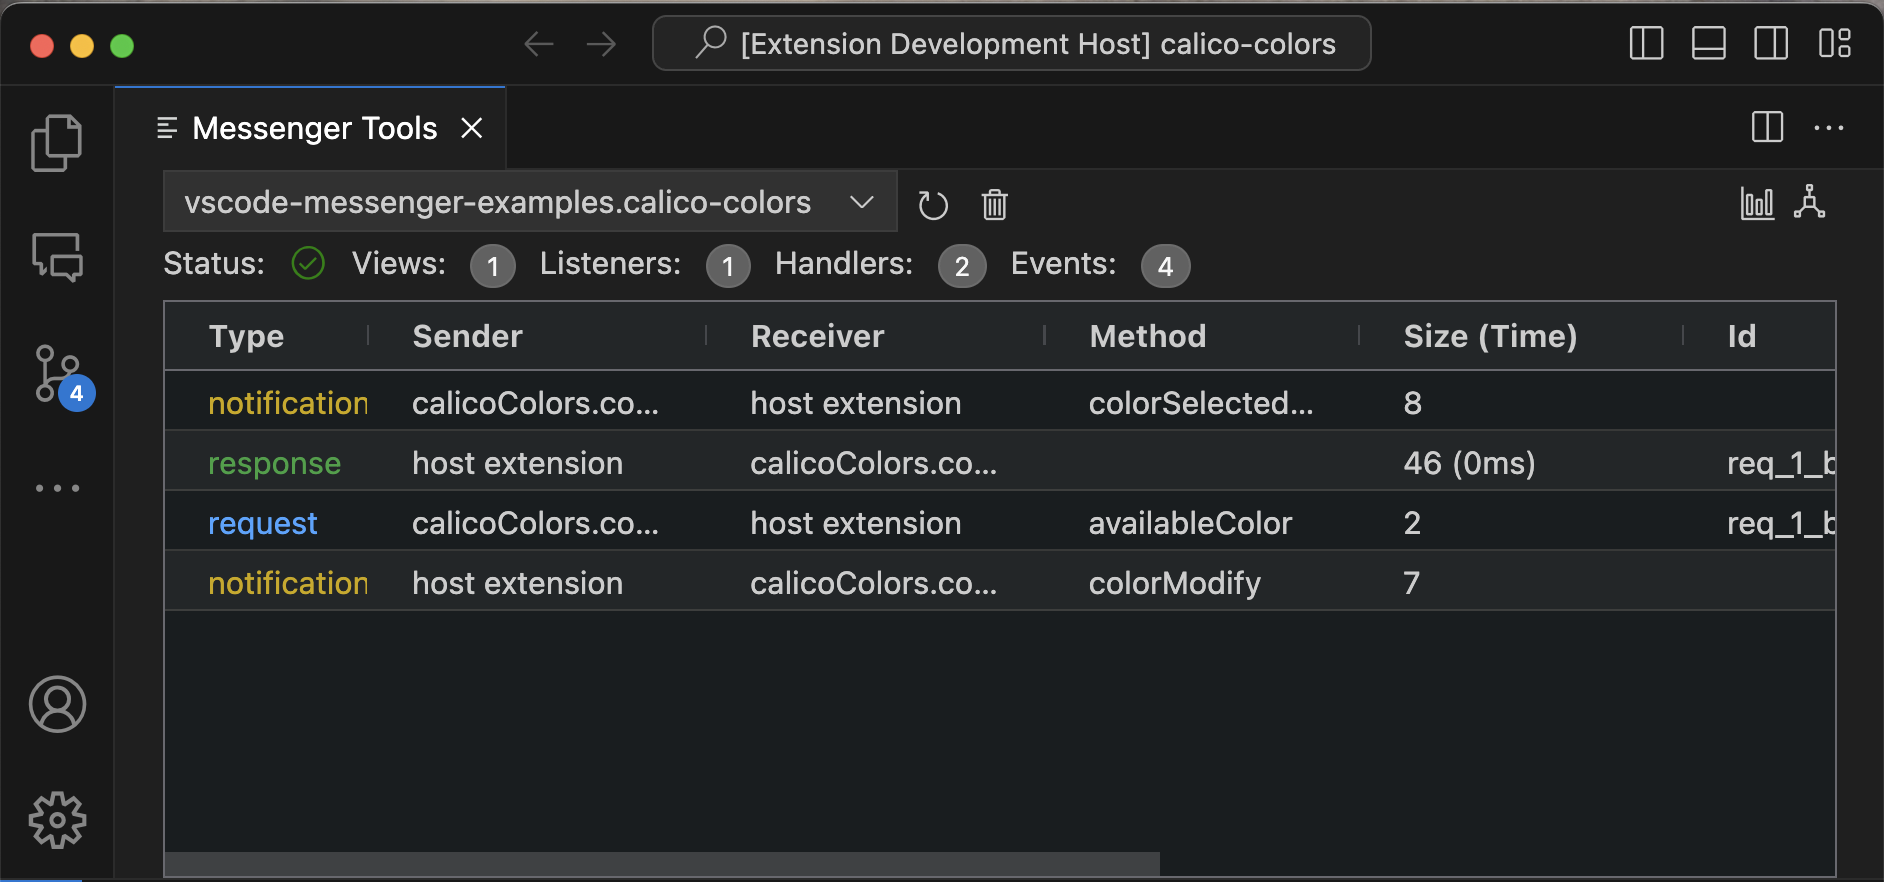
The VS Code Messenger Devtools extension provides a webview that gives a real-time insights into the messaging traffic within your development environment. It captures and visually presents the messages, such as notifications, requests, and responses, exchanged between an extension and its registered webviews. This capability is pivotal for developers looking to understand the interplay of components within their applications and troubleshoot issues efficiently. To open the tool, open the Command Palette (Shift + Cmd + P) and type ‘devtools’. Execute the command ‘Developer: Open vscode-messenger devtools’.
Detailed message insights
Each message displayed within the tool is accompanied by a set of details to give developers a clear understanding of the ongoing communication:
-
Sender/Receiver Identification: Easily identify where each message originates and which component is the intended recipient, making it easier to track the flow of communication.
-
Method Invoked: The visualization shows the specific method being called during the message exchange.
-
Message Size: Developers can view the size of the message payload, which can be critical for performance considerations, especially with large datasets or media.
-
Handling Time: The tool measures the time it takes to handle each message, providing insights into potential performance bottlenecks.
-
Additional Information: Every message is timestamped, allowing developers to reconstruct sequences of events and understand the timing between actions. Crucially, any errors that occur during message handling are captured and displayed, offering immediate feedback on exceptions or misconfigurations within the communication process.
This new layer of visibility is instrumental not only in developing new features but also in ongoing maintenance and support of VS Code extensions and webviews. By making the invisible visible, the VS Code Messenger Devtools empowers developers to fine-tune their applications, ensuring smooth, performant, and error-free experiences for users.
How to enable monitoring
To enable monitoring for an extension that uses the vscode-messenger library, the diagnostic API needs to be exposed by the host extension as part of the extension’s public API. This can be done in the activate function of the extension as follows:
// extension.ts in the extension package

export function activate(context: vscode.ExtensionContext) {
    const messenger = new Messenger({ debugLog: true });
    // ... //
    return messenger.diagnosticApi();
}
After this is done and the extension is reloaded, the VS Code Messenger Devtools extension will automatically detect the exposed diagnostic API and show your extension in the extensions Drop-Down list.
Conclusion
In conclusion, as VS Code continues to be widely adopted in the developer community, the need for sophisticated and maintainable custom tooling grows. With libraries like vscode-messenger, developers can more easily create and maintain reliable communications between extensions and webviews, enriching the overall functionality and robustness of the applications they build within VS Code. Together with the Messaging Visualization Tool, these resources mark a significant step forward in streamlining development and debugging processes within VS Code.
About the Author
Dennis Hübner
Dennis is a full-stack senior software engineer with additional specialization in language engineering and IDE tools development. He really enjoys his job, knowing that through software, he can make other people’s lives more interesting and their work easier.
Read more about this topic
Jan 3rd 2024
Markus Rudolph
Add views to a Langium-powered VS Code extension
Markus gives a simple introduction about webviews in VS Code and how to interact with Langium.
read the article

Nov 16th 2023
Mark Sujew
Embracing remote systems in local IDEs
Mark discusses remote development and collaborative editing. He introduces a new collaboration protocol to enable compatibility between IDEs.
watch the video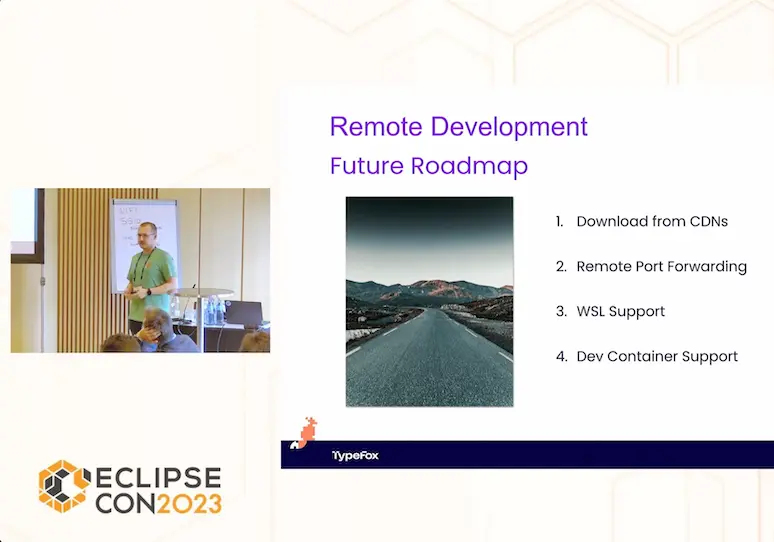
Oct 18th 2023
Mark Sujew
Embracing remote development for local IDEs
Mark discusses remote development, introduces key players like VS Code and JetBrains, and announces remote development as a new feature in Theia.
watch the video